 Claw
ClawHow to Install ClawMetry on Hostinger OpenClaw — One Command Setup
Hostinger makes it dead simple to deploy OpenClaw. One-click install, managed infrastructure, and Nexos AI credits built right in. But once your agent is running, you have no idea what it's actually doing.
ClawMetry fixes that. And installing it takes one prompt.
Total time: about 2 minutes.
What is Hostinger OpenClaw?
Hostinger offers 1-click OpenClaw deployment on their VPS plans. You pick a plan, click deploy, and your OpenClaw agent is live. No Docker, no manual server config, no fighting with dependencies.
What makes Hostinger especially attractive is the built-in Nexos AI credits. You don't need to bring your own API key or set up billing with a separate AI provider. The AI credits come with your hosting plan, so your agent works out of the box.
Channels like Telegram and Discord, cron jobs, sub-agents, persistent storage, and the full OpenClaw runtime are all included.
The problem
Your Hostinger OpenClaw agent runs 24/7. It processes messages, spawns sub-agents, runs cron jobs, calls tools, burns tokens. And you have zero visibility into any of it.
- How many tokens did it use today?
- Which model is costing you the most?
- Is that cron job actually running?
- Did the sub-agent it spawned succeed or fail silently?
- What was it doing at 3 AM when you were asleep?
You don't know. You're flying blind. The Nexos AI credits are convenient, but without observability you have no idea how fast they're being consumed or whether they're being spent wisely.
The one-command setup
Open your Hostinger OpenClaw agent chat (Telegram, Discord, or wherever you talk to it) and paste this:
Help me install in a long running PTY pip install clawmetry && clawmetry setup && setup clawmetry sync via supervisord
That's it. Your agent takes it from here.
Why "long running PTY"? The clawmetry setup step needs interactive input (it asks for your email to authenticate). Running in a PTY ensures the agent can handle the interactive prompts.
What happens
Your agent will do three things:
- Install ClawMetry via pip. Takes a few seconds.
- Connect to ClawMetry Cloud using
clawmetry connect. This authenticates your instance with end-to-end encryption. Your data stays yours. - Set up supervisord to keep the sync daemon running. Even if your Hostinger instance restarts, the ClawMetry sync process comes back automatically.
The whole process takes about a minute. Your agent handles every step, including answering the interactive prompts.
E2E encrypted. The connection between your Hostinger instance and ClawMetry Cloud is end-to-end encrypted. We can't read your session data, memory files, or tool calls. Only you can.
What you get
Once connected, open app.clawmetry.com. You'll see your Hostinger agent's activity in real time:
- Agent sessions with full tool call traces and thinking
- Token costs broken down by model, session, and tool
- Nexos AI credit usage so you know exactly how fast you're burning through your included credits
- Memory changes to SOUL.md, MEMORY.md, and other workspace files
- Cron jobs with status, schedule, and failure history
- Sub-agents with real-time progress, commands, and outcomes
- Session history with timeline and cost breakdown
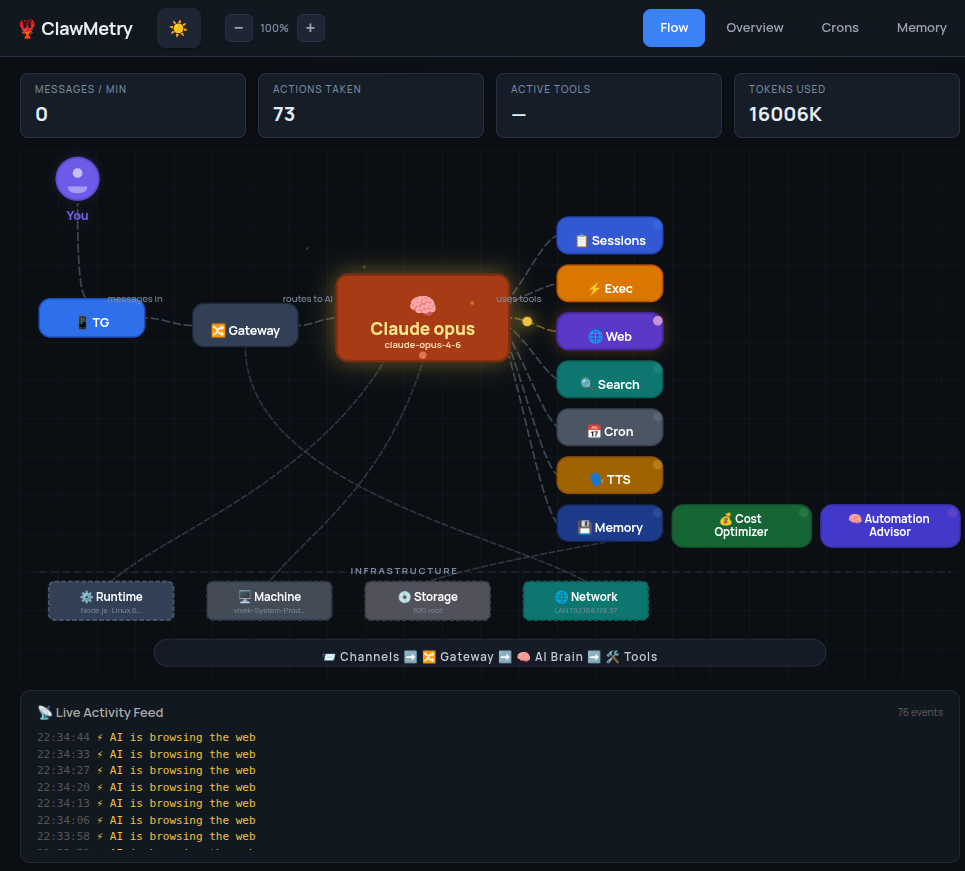
You go from "I hope my agent is working" to "I can see exactly what it's doing, what it costs, and whether it succeeded."
That's it
Hostinger made deploying OpenClaw a one-click affair. ClawMetry makes monitoring it a one-prompt affair. No SSH, no config files, no Docker containers.
You pasted one prompt. Your agent did the rest. And now you have full observability into everything it does, including how it uses those built-in Nexos AI credits.
More setup guides
See what your Hostinger agent is doing
Free, open source, E2E encrypted. One prompt to install.
Get ClawMetry